Showing posts with label Punch Art. Show all posts

Tuesday, November 22, 2011

CUTIE PATOOTIE - PENGUIN

Good afternoon everyone!

I have been busy in my stamp room designing cards for my upcoming Christmas Card Class, December 1st. I wanted to share one of the cards that we will be making. It is this CUTIE PATOOTIE PENGUIN card:


Isn't he the CUTEST? I think so! I got the penguin idea from pixiedustmom on splitcoaststampers. She did a super cute z-fold card using this style punch art penguin that you can see here. On my card the "ribbon" I used is actually a piece of the FROSTWOOD LODGE Designer Series Paper! It has some awesome flannel designs that make perfect "faux ribbon"

Here is a closer look at my cutie patootie penguin:


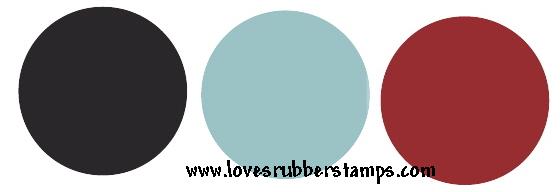
I can't wait to make more of them because they are super adorable! The color combination I used is from the Stampin Up Color Coach. This is an AWESOME tool to have because it gives you some coordinating color combinations for your designs. This color combination was featured on the MARINA MIST card and is the getting started combination. The colors are MARINA MIST, REAL RED & OLD OLIVE


If you don't have a Stampin Up Color Coach yet, you can purchase yours here. They are only $14.95 and are well worth it!

SPEAKING OF SHOPPING.... Stampin Up! has an AWESOME deal going on right now through November 30th called ONLINE EXTRAVAGANZA! You can get some great product bundles and special products up to 60% off! To see the featured products click HERE. After your done making your MUST HAVE list, shop online at my store. Don't forget to check the clearance rack also for more great deals!


Thanks for stopping by! Here are the products I used on my card:

Stampin Up! Stamp Sets: Merry Winter

Paper: Stampin Up! Old Olive, Real Read, Marina Mist, Frostwood Lodge Designer Series Paper, basic black, whisper white, daffodil delight, shimmer white

Ink: Stampin Up! Classic ink pads in old olive, pumpkin pie, white craft ink

Accessories: Stampin Up! Snowburst textured impressions embossing folder, big shot, color coach, white gel pen, dimensionals. PUNCHES USED: Extra large Oval, Large Oval, Scallop Circle Oval, Stocking builder, word window, owl builder punch.

Pin It

Saturday, October 1, 2011

Wedding Day

Good evening everyone!

I can't believe that it is October already! I wanted to share a card that I made for my soon to be sister-in-law's bridal shower. This is made using all Stampin Up! punches! This design is from Ellen Kemper's "Back of the Babe" series of cards that she created. I changed a few of the punches so they were all current.


Isn't she adorable? I love how it turned out! You will have to check out Ellen's blog. She is such a talented lady and she does some amazing things with punches!

Here are the punches that I used for this card:

Butterfly Punch #119848 (dress)
Scallop Oval Punch - #119856 (hair)
Heart to Heart Punch - #119881 (arms, punch out butterfly piece for back of dress)
Boho Blossoms Punch - #119858 (bouquet)
1 1/4" Circle Punch - #119861 (hat)
Extra Large Oval Punch - #119859 (hat brim)
Large Oval Punch - #119855 (ribbons)
Owl Builder Punch - #118074 (bows, hand)
Bird Builder Punch - #117191 (leaves in bouquet)

Additional Accesories:
Whisper White Taffeta Ribbon 3/8"
Basic Pearls
Big Shot
Perfect Polka Dots Embossing Folder
Final Press Embossing Folder
Square lattice Embossing Folder
Black Taffeta Ribbon 1/8"
Glue Dots
2-Way Glue Pen
Sponges

Cardstock Used:
Shimmer White
Cajun Craze
Always Artichoke
Peach Parfait
Daffodil Delight (sponged with daffodil ink)

Thanks for stopping by!

Pin It

Sunday, February 13, 2011

Check out my Punch Art HONEY BEE!

Good afternoon all!
I am SUPER excited to show you my card today! I designed a really cute HONEY BEE using Stampin Up! punches! I think it turned out adorable!


What do you think? Here are the punches I used to make the bee:

Head: 1 1/4" circle
Eyes: Boho Blossoms flower but between petals like a tear drop
Nose: Circle from Two Step Owl
Body: Ornament Punch with the little tab cut off
Wings: Two Step Bird Punch (the wings)
Legs & Arm: Swirls & Scribbles Die
Antennaes: The stem from Two Step Bird Punch
Hearts on Antennaes from the Two Step Owl Punch

For the wings I stamped the flourish from Priceless in versamark onto vellum cardstock then heat embossed with heat & stick powder then Dazzling Diamonds. After I did that then I punched them out. The "honeycomb" I made using the plastic from the top of a clementine box when you buy the oranges. This is my entry for this week's Mojo Monday sketch challenge week 177. Here is the sketch:


Hope you try a bee...they are super cute! If you do be sure and leave a message with your creation I would love to see it!

Stampin Up! Stamp Sets: Define Your Life, Just Buzzin' By, Priceless

Paper: Stampin Up! Crumb Cake, Real Red, Daffodil Delight, Chocolate Chip, Basic Black, Early Espresso, Very Vanilla, Whisper White, Watercolor paper

Ink: Stampin Up! Classic ink pads in Soft Suede, Chocolate Chip, More Mustard

Accessories: Stampin Up! Versamark, Dazzling Diamonds, Heat & Stick Powder, white gel pen, pastels, stampin write marker black, Punches listed above in description, word window punch, dimensionals, versamarker, heat tool, Big shot, Swirls & Scribbles die, stamp-a-ma-jig, Aqua painters, watercolor pencils

Pin It

Saturday, January 8, 2011

Makeover Build-A-Bear Valentine

Good Afternoon everyone! I wanted to share with you today a super cute way to makeover the Build-A-Bear die cut from Stampin Up! I think it is much cuter this way than the original :) If you have seen the orignal Build-a-Bear die cuts you know what I am talking about. Anyway here is my super simple Valentine's Day card I made with the Build-A-Bear.


I love how it turned out! Here are the super easy things you add to the build-a-bear to give him his "makeover" My bear was done using Soft Suede & Crumb cake (all pieces sponged with soft suede)

For the Head:
1 - 1 1/4" circle for the head
2 - 3/4" circles for the outside ears
2 - 1/2" circles in crumb cake for the inner ear
1 - small oval in crumb cake
1 - black heart from the owl punch for the nose
For his eyes I punched the small flower from Boho Blossoms then cut betweent two petals to the middle to get the teardrop shape

Glue the ears together and glue down over the original ears on the die cut. Glue the eyes on the head piece and use a white gel pen to add highlights. I used a fine tip black pen to add eyebrows and eyelashes. Pop the oval on a dimensional over the bottom half of the head piece for the muzzle. I used my black pen to add freckles and draw the mouth line & chalk in pretty in pink for blush on cheeks. Pop your nose using a glue dot. Then glue the completed head down over the original face.

For the Body - use the ornament punch then cut off the ornament top. place upside down on dimensionals so the point is facing the head. The heart is from the heart to heart punch.

Add a ribbon for the "tie" to close the gap and help hide any little area left from the original face and waaah-laaa build a bear makeover is complete!

To make mine a Valentine card I have my bear holding a heart from Love You Much. I made the frame on the front cover using the brand new textured impressions embossing folder called Framed Tulips in the new Occasions Mini Catalog, then used my white gel pen to add dots to the tulips. Super easy & Super cute! Have a great day everyone!

Stampin Up! Stamp Sets: Love You Much

Paper: Stampin Up! Real Red, Soft Suede, Crumb Cake, Very Vanilla, Basic Black

Ink: Stampin Up! Classic ink pads in Real Red, Soft Suede (for sponging)

Accessories: Stampin Up! Build-A-Bear die, Punches: ornament punch, 1 1/4" circle, 3/4" circle, 1/2" circle, small oval, owl punch, boho blossoms, heart to heart. Real Red 1/4" grosgrain, stampin pastels, white gel pen, fine tip black marker, dimensionals, sponges, textured impressions embossing folder framed tulips, big shot

Pin It

Friday, January 7, 2011

Punch Art Lovin' Lion

Good morning everyone! I am still not feeling that great today so this will be a short but sweet post! I came across an awesome blog by a super talented designer named Kim Score. She creates amazing punch art using Stampin Up! punches. The card I am showing you today was inspired by one of the tutorials she offered called Lovin Lion. I did have to use a few different punches than she did because I didn't have all of them.....YET...LOL! Here is my card:


Here is what I used to make the Punch Art Lion for my card:

1 1/4" Circle in More Mustard - HEAD
3/4" Circle in More Mustard - EARS & PAWS
1/2" Circle in Daffodil Delight - EARS
Small Oval in Daffodil Delight - MUZZLE
Small heart from the Two-Step Owl punch in Pink Pirouette - NOSE
Extra Large Fancy Flower in Cajun Craze - MANE
Extra Large Two Step Bird in More Mustard - TAIL
Boho Blossoms smallest flower in Basic Black - EYES(punch flower then cut between each petal to middle)

I didn't use a body because mine is just a "peeker"

I also chose the colors for my card using my color coach. This is one of the suggested color combinations:

PACIFIC POINT , DAFFODIL DELIGHT & RICH RAZZLEBERRY


I think that this would make a super cute birthday card for a little boy! Have a great day all!

Supplies used:
Stampin Up! Stamp Sets: Short & Sweet

Paper: Stampin Up! Pacific Point, Daffodil Delight, Cajun Craze, More Mustard, Pink Pirouette, Basic Black, Rich Razzleberry DSP paper in Blueberry Crisp

Ink: Stampin Up! Classic ink pads in Rich Razzleberry, cajun craze, more mustard, daffodil delight

Accessories: Stampin Up! Stampin Up! punches: 1/4" circle, 3/4" circle, 1/2" circle, boho blossoms, extra large fancy flower, scallop oval, small oval, large oval, two step bird, owl punch, sponges, white gel pen, dimensionals, black pen

Pin It

Thursday, December 2, 2010

Reindeer Peeker made with Owl Punch!!

I am sooooo excited to share this card! I haven't seen this anywhere yet so who knows, I maybe the first - LOL! I was trying to think of a card to do and my owl punch sitting on my desk caught my eye. I started looking at the pieces and the owl body reminded me of a reindeer head and then the stomach part reminded me of hooves and WAAAAHHHLAAAAH.... my reindeer peeker was born! Rudolph's nose, the white and black part of the eye, are all from the owl punch too. The pinks of the ears, the antlers and the marina mist eyes are all pieces from the Sizzix die Swirls Scribbles. Check Rudolph out!


Isn't he the cutest??

The layout for this card was inspired by this one I saw on splitcoast by Bee-Bee.

I used the color coach to choose my colors. This color scheme was suggested on the basic black card: Cherry Cobbler, Baja Breeze & Basic Black.


I stamped the small swirl from priceless in versamark & heat embossed with iridescent ice on the baja breeze layer. Here is a closer peek at Rudolph for you!


I LOVE how he turned out - too cute!

Here is what I used:

Stampin Up! Stamp Sets: Big On Christmas, Priceless

Paper: Stampin Up! Cherry Cobbler, Baja Breeze, Soft Suede, Basic Black, Real Red, Whisper White, Pink Pirouette, Marina Mist

Ink: Stampin Up! Classic ink pads in Chocolate Chip, Cherry Cobbler

Accessories: Stampin Up! Versamark, Iridescent Ice, Heat tool, 1/8" black taffeta ribbon, dimensionals, blender pen, Stampin Up pastel chalk, Stampin Wrute markers in Old Olive, More Mustard, Basic Black, dimensionals, Owl Punch, Swirls Scribbles Sizzix Die, Big Shot, Color Coach, White Gel pen, Crystal effects

Pin It

Monday, June 7, 2010

WANTED - Punch Art Card

Good Evening all!

I was going to post this card for you this morning but blogger seemed to be down for awhile. This is the 4th card we made in my faux metal technique class. I wanted to demonstrate the GUN METAL technique because I love the look of it and when I saw this card done by carriejoe I knew I had to make one myself and use gun metal for his hat star.

Here is a close up of what the gun metal technique looks like:


HOW TO DO THE GUN METAL TECHNIQUE:
Materials - Chipboard, Encore ink pad, Glassy glaze enamel, heat gun
STEP 1 - Choose your chipboard shape
Step 2 - Cover the front of your chipboard piece with silver or gold encore ink, using the encore ink pad. I used the silver on mine. Easiest way to do this is to lay your chipboard down on scratch paper and then rub or press your encore pad onto it. Do this until your piece is completely covered in ink.
STEP 3 - Cover your chipboard with glassy glaze enamel
STEP 4 - Heat the glassy glaze until it bubbles, then let it cool & Wahlah - gun metal!
Optional Step - After your piece is cooled you can rub some black ink over the gun metal with a sponge to age it a bit - I did not do this on either of my pieces. If you don't have glassy glaze you can substitue UTEE (ultra thick embossing enamel) they are similiar in consistency, the glassy glaze is a little finer but really close.

Here is my finished card:


Isn't he the cutest? Here is what I used to make the little wanted dude. The hat was made using the Stampin Up! Top note die. I cut one in close to cocoa cardstock and then cut it in half to use for the hat. The hat brim is made using 2 long leaves from the Sizzix Leaves #2 die. I just cut a small strip of chocolate chip for the hat stripe. All hat pieces are sponged with chocolate chip ink for dimension. His face was an oval cut out in blush blossom using the coluzzle. His mask is also 2 leaves without the stems from the Sizzix Leaves #2 die in basic black. Then I punched 2 white circles with the 3/4" circle punch, his nose and the blacks of his eyes are punched with the 1/2" circle punch. His nose is popped on dimensionals to peek over the wanted sign. I used a white gel pen to make the highlight on his pupils.

This is a really fun card to make and he is sooo cute! Hope you try one!

Stamp Sets: Wanted

Paper: Stampin Up! Creamy Caramel, Close to Cocoa, Chocolate Chip, Basic Black, Bluch Blossom, Whisper White, Very Vanilla

Ink: Stampin Up! Classic ink pads in Chocolate Chip, Creamy caramel, encore silver ink pad

Accessories: Stampin Up! Chipboard stsr from the On Board Essentials set, Sizzix top note die, Sizziix Leaves #2 die, coluzzle, 3/4" & 1/2" circle punches, dimensionals, distress edger, vintage brads, glassy glaze enamel, heat gun

Have a great night all!

Pin It

Sunday, June 6, 2010

Pretty Tulips - Faux Metal Tin Ceiling

Afternoon stampers!

I wanted to share the 3rd card that we did at my faux metal technique class featuring Faux Metal Tin Ceiling. This is such an elegant background I absolutely LOVE it!

Here is the card:


Turned out really pretty I think! I drew my inspiration from a lady by the name of Diana Gibbs. She did a gorgeous card using this same technique and color scheme and even put together an awesome tutorial video on how to do this technique. If you want to see the tutorial that she put together click here:

FAUX METAL TIN CEILING

To make the background I used the Textured Impressions FINIAL PRESS embossing folder.

My vase and tulips were made using Stampin Up! punches. To create the vase take the ornament punch and punch out an ornament. Snip off the pointed end so it is flat. I embossed mine with the same embossing folder as the background for added texture. The tulips were made using the Stampin Up! Two-Step bird punch. You punch 3 of his wings in whatever color you want your tulips to be. Mine were done in crushed curry. You can sponge the edges of your flowers if you want also. Be sure to layer them so your two wing tips for the outside petals are both facing the outside, the middle one doesn't matter. glue them together. Then punch a stem of leaves from the same bird punch for your flower stems. I popped my tulip heads on dimensionals.

Here is the full list of products used:

Stamp Sets: None! All punches!

Paper: Stampin Up! Bashful Blue, Basic Black, Whisper White, Crushed Curry, Old Olive, Sahara Sand was used for my tin ceiling base

Ink: Stampin Up! Silver Embossing powder & Versamark

Accessories: Stampin Up! Textured Impressions Embossing Folder - FINIAL PRESS, Two-Step Bird Punch, Ornament punch, dimensionals, 2-way glue pen

I love how this card turned out! This is a beautiful technique and I hope you try one and put a link to your card in your comment.

Pin It