Showing posts with label Tutorials. Show all posts

Wednesday, February 19, 2014

Crafty Sentiments Designs - SNEAK PEEK!

Hi Stampers!


Today I have a cute SNEAK PEEK for you at one of the new release stamps coming from Crafty Sentiments Designs!

This cutie is called Prom Dress and she will be available for purchase on Feb. 22nd:


I decided to try one of the projects that has been on my "MUST TRY SOMEDAY" list and that is a Faux Book Card or Book Shadow Box, whichever you want to call it! I am pretty happy how it turned out...here are some other pictures to show the different sides...


                                    If you want to create a Faux Book here are the instructions:

Cut the cardstock for your cover at 5 1/4" x 9 1/2" and then score it at 4 1/4" and 5 1/4"
The Designer Paper for the cover is cut at 4" x 5" 
The Designer Paper for the Spine and inside spine is cut at 3/4" x 5"

To create your book pages you will need to cut:
2 cardstock pieces that measure 4" x 10"
2 cardstock pieces that measure 5" x 10"

You are going to score all four of these every 1/2" to the very end.
To create the book pages - take each piece and accordion fold these back and forth - be sure
to use your bone folder between each fold to get nice, crisp folds.
After you have the piece all folded - sponge the edges with ink if you wish.

Then take one long piece and one short piece and "marry" them so they make a right angle, 
sliding them together so the pages alternate. Glue the outside flaps to hold the pages in place.
Add the other long and short end to create your book pages, gluing each outside flap together
until you have a full rectangle. 

Place your decorated insert onto the inside back cover and then glue your book pages over it.
To create the decorated top of the pages, just cut strips of cardstock and punch one edge.
Glue down on top of the book pages, miter the corners of the two top strips in you wish.

Then just decorate as you want!


Thanks for stopping by today! Be sure to visit the INSPIRATION BLOG and see MORE Sneak Peeks from the other Design Team Members! 

Laura

I will be entering this in the following challenges:

Papertake Weekly - Lovely Layers
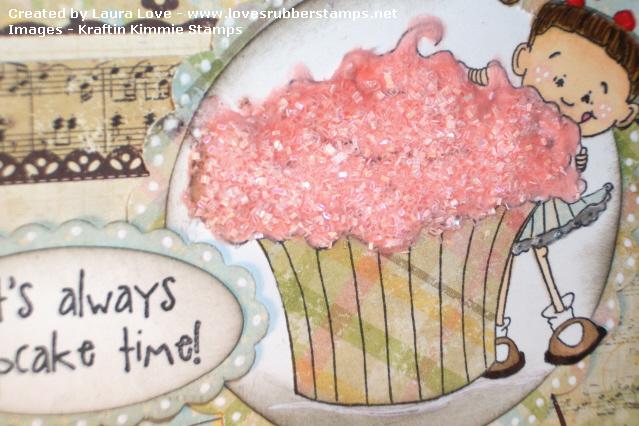
Craftin Dessert Divas - Linky Party 25 Glitter
Crafting From The Heart - Anything Goes Use Flowers
Craft Your Passion Challenges - Girly Girl
Creatalicious Challeges - Pearls & Glitter
CMC Copic Challenge - Anything Goes
Delicicious Doodles - Ribbon & Bling
Wags N Whiskers - BINGO - Line Glitter, Ribbon, Red

Sunday, September 29, 2013

Sensational Sunday Inspirations + CANDY!

Hi Stampers,

Hope you are having a great weekend! Mine started off way better than my week went with a new addition to our family :)


This is my new little nephew Jaxsyn! He was born yesterday :) He is a little guy - only 6 lbs 5 oz and 19.5" long!

This week the our Sunday Blog Hop winner was chosen from Nina's Blog:

Here are your random numbers:


9


Timestamp:  2013-09-29 06:00:57 UTC

Congratulations to Debby4000 who said: Absolutely adorable and gorgeous too.
luv Debby

Congratulations Debby! You're name will be in the $20.00 Gift Card Drawing on October 6th!!

In the Drawing so far:

1. Iamuniquelyimperfect
2. JoAnn
3. Rachel Parys
4. Debby 4000

Welcome to the Loves Rubberstamps weekly Sensational Sunday Blog Hop! The Design Team has created some gorgeous projects for your Inspiration. Check out each link and leave a comment. If you get lost along the way, each stop will have a full list of links. One of the Design Team posts is the hop's Sensational Sunday Sweet Spot and a name will be drawn from that list of comments to be in a monthly drawing for a $20 Loves Rubberstamps Gift Voucher!  We will draw the winner of the Voucher the 1st Sunday of each month! Remember, you have until 8:00 pm CST Saturday to leave your comments!

For my project I thought I would share my Secret Release project that I created for the September New Release for Crafty Sentiments Designs. I have had quite a few people ask if we will be getting the new releases in the store and the answer is YES! I do plan on getting ALL of the Crafty Sentiments Designs images that we can carry in the store, listed as a Preorder. That way we make sure we are ordering the customer requests first because there have been quite a few new ones since our last order! So look for those this week!

I was given the super cute Space Walking image for my project. Now this probably dates me, but just remember I am 29 :) ... when I was little one of my favorite candy treats to get when Grandpa took us to the store was Pop Rocks. When I saw this image I thought it would be cute to make a little Pop Rocks Wallet! Pop Rocks are getting harder to find now, but you can still find then at convenience stores and sometimes around the holidays in the bigger stores.


I colored my image with Copic markers. I did the background around my image by just doing dots in different shades because I wanted it to look like they were floating in space. The papers that I used are from Graphic 45 which we will be getting in the store soon :)

If you are wondering how I created my Pop Rocks Wallet here is a tutorial for you...

To create the wallet:
Take an 8.5” x 5.5” piece of cardstock
Along the 8.5” side – Score at 3 3/16” and 6 3/8”
Take Designer paper to Decorate if you wish…
Your Designer Paper to cover the front will be – 3 1/8” x 5 3/8”
                                   to cover the back cover – 2 7/8” x 5 3/8”
                                   For the Inside Flap Piece – 2” x 5 3/8”
You will want to place your Designer Paper on the Inside Flap FIRST, then place your two Brads to hold the flap shut, and then place your back cover Designer Paper on. That way the back sides of the brads are covered.
To Create the Belly Band:
Take an 8” long piece of cardstock or Designer Paper and score at  2 5/16” on each end
Fold around and secure. You can mount your image to the Belly Band.

Be sure to check out what the other Designers have for you today ! Don't forget to leave comments on all the blogs for the most chances to win to be in our drawing on October 6th!! Enjoy your Sunday and thanks for stopping by!

Nina


Have a great day!

Laura

I will be entering this in the following challenges:

Glitter & Sparkle Challenge - Add Some Metal  (metal sparkle brads)

Saturday, April 6, 2013

No Color Anya

Hi Stampers!

Hope you are enjoying your weekend so far! Today is my very first day to take over Saturday's Inspiration Day for Jacqueline. So I hope to inspire you just as much :)

I really love to play along in challenges because sometimes they can really make you think and try something new. It is fun to kind of go outside your normal style once in awhile. That is what I did for today's inspiration project! I saw an interesting challenge on the Anyone for Anya Challenge blog of creating a project where you could not color your image. Now...I have been working really hard on my coloring and trying to learn new things using copic markers so this was a huge stretch for me to NOT color an image - LOL! So I decided to jump out of my box, mix it up and try something totally new :)

Here is my card...with NO COLORING! YIKES!


All in all I actually think it turned out super cute! This is one of my favorite Anya images called Do Si Do Anya. When I saw her the very first time I always pictured her as having a cute yellow gingham dress so since I couldn't color her...I used the colors for my background papers and then paper pieced her bow to tie the image in :) My papers are from the new Bo Bunny Prairie Chic paper pack.

I created a few of my own embellishments for this card - I made a faux button for the heart so it matched my paper. If you have never made your own button before it is TOTALLY easy and I love doing it because no matter what - you will always have the perfect button to match your project! To create my button this is all I did:

1. Punched out 5 - 3/4" circles out of crumb cake cardstock.
2. Punched out 1 - 3/4" circle of my designer paper for the top.
3. Used my button hole punch to punch each circle with the holes. I do this before gluing them together because it gets too thick other wise. I punch one, keep it on my button hole punch and then use it as a guide for the other ones.
4. Glue each of the circles together making sure the button holes line up. Glue your designer paper circle on top.
5. Take a fingernail file or sandpaper, whatever you have and sand the edges to make the edges disappear and become smooth.
6. You can then add glossy accents if you want to make it shiny - I didn't want a shiny button so I just sponged it instead with Tim Holtz Distress Ink - Walnut Stain. Added some twine and that's it!

I also added a loopy bloom that I created using the My Favorite Things Die-Namics Die Loopy Blooms - which are my new favorite addiction - LOL! They are just too cute! The sentiment is from the new Greeting Farm Die set called Delicate Words Die. I totally LOVE this die! This is my first die that I have that creates words and I love how they look!

For my layout I used this week's sketch from The Greeting Farm's Double Take Tuesday Challenge:


I hope I inspired you to take some chances once in awhile and try a new style or technique that you may not otherwise try!

Be sure to join us right here tomorrow to hop along with our Design Team on our Sensational Sunday Inspirations Blog Hop! We have an awesome prize up for grabs that will be hidden on one of the Design Team members blogs! It is a lot of fun and you get loads of Inspiration from the team :)

Have a great weekend!
Happy Stampin!
Laura

Pin It

I will be entering this in the following challenges:

The Greeting Farm - Double Take Tuesday Sketch
Anyone for Anya - No Color, No Cry!
2 Sisters Challenge Blog - Anything Goes
Crafty Ribbons - Anything Goes With Ribbon
Moving Along with the Times - Let's Get Krafty - Use Kraft
Tuesday Alchemy - #53 Over the Pastel Rainbow
Top Tip Tuesday - #98 - Girls & Boys Come out to Play
ABC Challenges - K is for Kraft
By the Cute & Girls - April Challenge - Vintage
Natalie & Amy's Challenge - Monochromatic
Cupcake Craft Challenges - Use Kraft
Lexi's Creations - Use Punches & Dies
Simon Says Stamp & Show - Anything Goes


Friday, September 14, 2012

Yummy Frosting...Oh My!

Hi Stampers....

I am back and got my pics all taken of my card that should have posted YESTERDAY...hubby's and their need for sleep...geeze - LOL!!!

Anyway here it is...my Birthday Lulu with her super yummy paper pieced cupcake with my homemade paper "frosting"...


I made this for this week's Kraftin Kimmie Challenge to use paper piecing on your card. I paper pieced the cupcake wrapper and Lulu's party hat and dress. I used papers from the Simple Stories 6x6 paper pack - Baby Steps.

The color scheme works for the challenge at Polka Doodles....Ice Cream Colors. I love ice cream and I have lots of favorite flavors so it is hard to pick just one...
Neopolitan (cuz you get 3 flavors in one!) Chocolate (my base), Strawberry (frosting), Vanilla (main designer paper color)
Then once in a great while you just need pistachio which is sort of the greens in my papers...PLUS nothing goes better with ice cream than Cupcakes with Frosting!

My homemade "frosting" is a mixture of shaving cream and elmer's white glue mixed up so it is thick and goopy like melty half dried out cool whip and then I mixed re-inker drops in to color it. When it was thick and goopy enough I piled it on with my stir sick and then sprinkled pink chunk glitter on top and let it sit and dry overnight. It dries so it is a little puffy and the glitter stays on perfectly!

Here are some close ups, I was trying to capture the puffy frosting like texture, kinda hard to get so I hope you can see it ok....


I also did the "out of the box" technique for my circle piece. The layout is for this week's Mojo Monday Challenge #258.


Be sure that you check out HOLLY'S CARD from today...she also created an ADORABLE Kraftin Kimmie Paper Pieced creation!

Don't miss our DESIGN TEAM CALL either!  I am going to try and figure out how to make it a sticky...so wish me luck :)

I am off to TRY and sleep since I have to report to work...not by choice... at 3am and work until 3pm...how exciting!

Happy Stampin All! Try the frosting technique and let me know what you think! Leave a link to your project so I can check it out :)
Laura

Pin It

Here are links to the challenges that I am entering this card into:

Kraftin Kimmie Stamps - Challenge #145 - Piece Out
Mojo Monday - Sketch Challenge # 258
Avadares Challenge Blog - Make It Sparkle
Jellypark Challenges - All About the Children
Polka Doodles - Ice Cream Colors
The Poodles Parlour - Here Come The Girls
QKR Stampede - Birthday Celebrations
Aud Sentiments Challenge - Something Funny, Hunny!
Dutch Dare Card Challenge - Sugar & Spice
Milk Coffee Challenge - Use 2 Different Shapes
Paper Crafting Journey - Use a Sentiment
Shelly's Images - Anything Goes - 2nd Entry
Divas By Design - For a Child
Bearly Mine Challenges - Week 52 - Anything Goes
Created With Love - Birthdays
Paper Pretties - Wednesday Challenge - PWC223 - Paper Punches
Paper Pretties - Monday Challenge - PPMC56 - Birthday Card
There She Goes - Let Them Eat Cake
Stamp and Create - Anything Goes
Creative Inspirations Paint - Inspired by Birthdays
Pile It On - #37 - Patterned Paper - 2nd Entry
The Paper Shelter Challenge Blog - Punch It
The Squirrel & The Fox - #26 - Anything Goes - 2nd Entry


Sunday, July 15, 2012

Paper Smooches Pop-Up Stage Card

Good Evening All!

Hope you had a wonderful day! I had a chance to sneak down to my Stampin Studio and play around so I thought I would share what I did!

I have been wanting to play along in the Paper Smooches Sparks Challenge for awhile now and when I saw this week's challenge, which is a designer draft, I knew IMMEDIATELY what I wanted to do! Here is my card:


This is a Pop-Up Stage card which I have been wanting to try for awhile now. My little critters and the fire "pop up" when you open the card up. The Designer Draft Sketch from paper Smooches this week is what I used on the background piece. Here is the Draft Sketch:


When I saw this sketch I immediately thought of the piece on the left as a tree, and the bottom area as grass and what better set to use with trees and grass then my super favorite Paper Smooches set called Happy Camper!

Here is a close up of the stage area:


I colored all of my critters using Spectrum Noir Alcohol Ink Markers. My marshmallows have Liquid Applique applied, then heat set so it puffs and then I used my markers to "toast" them.

Here are some close ups of all of my critters!


My bear - don't you love the eyelashes I added? I also tried to texture the fur with my spectrum markers.


My Deer! You can see the Blanket roll and Skeeter Spray that is from a Stampin Up! stamp set called Under The Stars behind my deer.


My Raccoon which is also from the Stampin Up! Stamp set called Under the Stars. The marshmallow stick that he is holding is from the Paper Smooches set Happy Camper.


My Ant which is from the Paper Smooches Alfresco stamp set, and he is carrying a yummy smore that is from the Stampin Up! stamp set - Under the Stars. I added some fun google eyes to my ant too!

The stars in the sky are from my Spellbinders Star Circles Nestibilities. The Grass is made using the C.C. Designs Cutters Die Grass Border Die.

I hope you enjoyed my little scene as much as I had fun making it! This is my very first pop up stage card and they are really fun to do! I used the tutorial for the Pop-Up Stage from Splitcoaststampers.

Here are the challenges that I would like to enter my card into:

Paper Smooches Sparks - July 9th-15th Designer Drafts
Pile It On - PIO #29 - Kick Back & Relax
That Craft Place - Anything Goes
Craft Punked - Summertime
Creative Belli - Stars
Fab 'N Funky Challenges - #129 Summer Holiday
Inky Impressions - The Great Outdoors
Sassy Cheryl's Challenge Blog - Summer Fun
Stamp N Plus - Anything Goes
Truly Madly Crafty Challenges - Animals

Happy Stampin!
Laura

Pin It

Sunday, June 10, 2012

My Sunday Shares - June 10th

Good Afternoon Stampers!

Hope you enjoyed your weekend...mine is just starting so I treated myself to sleeping in this morning :) You have to do that every now and then I think! I have a LOOOONG list of things I need to get done around the house today...mow the yard, dishes, laundry, dust...well you get the jist of my day...all of the not so fun house chores...BUT after I am done I am going to go play in my stamp studio...I am looking forward to THAT!

Today's shares will be a little different. I didn't have much time this week to look around the galleries or do my company searches so I decided today to share some cool you tube videos that I have in my "favorites" with you, instead of cards today.

Today's videos are all created by Darlene Devries of DarleneDesign.com. She posts a new video on you tube about every Wednesday. I was searching around about creating with copics on you tube one day and came across this video she did. I loved the look of her card using copic markers on patterened paper. She uses Stampin Up! supplies but you could easily use any light colored scrapbook designer papers or stamps for this technique.


The second video I want to share with you is one about creating a card using multiple embossing powders. This card is really pretty! Not only does this video have a beautiful project...it also had a COOL TIP on how to create smaller frames with your layer dies. Doing this doubles the sizes of layers you can get out of your layer dies!!


I thought the idea of tracing the outside of your die and then cutting it out with your scissors was genius. You can get 2 sizes of layers for each die! This would work with many die brands too. Perfect for when you want just a very subtle layer.

This last video I will share with you really showcases the way Darlene colors with her copics. I really loved this method and thought that it is a great way for beginners to achieve the professional looking blends with copics. This card that she creates using a Hero Arts cupcakes set showcases this coloring style perfectly. Plus I love cupcakes :)


I hope you enjoyed today's shares. If you want to check out Darlene's other videos...and believe me she has a LOT of great ones... you can visit her you tube channel - darlene003

We will be starting to stock the copic markers at Loves Rubberstamps soon! YAY! I am excited for that! Hero Arts is also on our list of suppliers that we will be adding in the future too :)

Happy Stampin Everyone!
Laura

Pin It

Thursday, April 26, 2012

Faux Patina....Sunflower!

Looking for this week's Loves Rubberstamps Blog Challenge? Go Here: April Showers

Hi Everyone! Hope your day has been a good one! Today's card was really fun for me to make! I used a technique that I had never tried before and thought it turned out really pretty!

The Technique I used on the background is called Faux Patina and I saw the tutorial on splitcoaststampers. I used different colors than in the tutorial so it would qualify for this weeks color challenge (CC372) on splitcoaststampers... using More Mustard, Pool Party, & Early Espresso. The thing about color challenges sometimes is that I would probably NEVER have chosen these on my own but after making this card - I love them together! This would be a great color combo for Fall projects too.

The colors I used to create the Faux Patina background on this card are: Crumb Cake, Pool Party, Always Artichoke & Early Espresso

The stamp that I used is one of my favorite flowers... SUNFLOWERS! This sunflower is from the Paint Fushion Collection by Sheena Douglass from Crafter's Companion.

I colored my flower by sponging on ink. I used More Mustard on the petals, Early Espresso in the middle. I used pool party in the middle of my leaf and then always artichoke and sponged the edges with early espresso. I did two layers of the sunflower and popped them on dimensionals to give it more of a 3D look.

The layout for my card is this week's Mojo Monday Sketch #238

After making this card I played around with the Faux Patina Technique and tried using a few different color combos and thought they all turned out pretty neat in their own ways. Just remember to use:

1 - A light base color
2 - A blue color
3 - A green color
4 - A brown color
5 - then versamark random areas and gold emboss

Here are the other color combos I tried left to right:

1 - More Mustard, Tempting Turquoise, Old Olove & Chocolate Chip
2 - Sahara Sand, Pool Party, Pear Pizazz & Soft Suede
3 - Crumb Cake, Marina Mist, Always Artichoke, Early Espresso

Hope you will try this technique!
Happy Stamping! - Laura

Pin It

Wednesday, November 23, 2011

Cracked Glass - Cozy Christmas Lodge

Good afternoon stampers!

Today's card will be another one that I designed for my Christmas card class coming up. It uses the GORGEOUS stamp set Christmas Lodge that is in the Holiday Mini. The layout and basic design was inspired by this card I saw created by flowerbugnd1 on splitcoaststampers. I changed the colors of mine and used the cracked glass technique on my card as well. Here is my version:


I really love the cracked glass technique with this stamp set! I really love how the lodge looks like a vintage old photograph cracked with age using the sahara sand cardstock as a base. To get this look I stamped my lodge with early espresso on sahara sand, filled in the snow with a white gel pen and then sponged the edges with chocolate chip ink before doing the cracked glass technique.

If you want to try the CRACKED GLASS TECHNIQUE here is what you do:

First you will need a versamark pad, Stampin Ups! Glassy Glaze (retired now) or you can use UTEE (ultra thick embossing enamel) or regular clear embossing powder (you will just have to use more layers) and then you will need your heat tool.

1. After you stamp and color your image, stamp the whole panel with the versamark ink pad.

2. Completely cover the panel with your embossing enamel or powder. Shake off excess and heat with the heat tool. If you are using glassy glaze or the UTEE the first heating will look lumpy and it will look like spots are missed. Don't worry about it!

3. As soon as the powder is melted, stamp the whole panel again with versamark ink. Cover your panel again with a new layer of embossing enamel or powder, shake off excess and then reheat. This time it will be much smoother and even looking.

4. If you are using the UTEE or glassy glaze you need to do only 2 or 3 layers of embossing powder. IF you are using the regular clear embossing powder you will need to repeat the versamark and then emboss with new layer of powder a total of 4 or 5 times to get it thick enough.

5. After you get your last layer of embossing powder done - stick the panel in the freezer for about 2 minutes. This makes it hard and it cracks easier. It may curl a little bit but that is OK because when you crack it, it will straighten out.

6. Remove it from the freezer and start bending it where you want the cracks to be. Keep going until it is cracked how you like. You can sponge over the top with a dark ink like, early espresso or chocolate chip and it kind of fills in the cracks to give it a more aged look. I didn't do this on mine because of the darker background I stamped on, but it works good when you do this technique on white or very vanilla.

7. After your done cracking your piece, layer and add to your card :)

Hope this makes sense! There is a picture tutorial and a video posted on splitcoaststampers on how to do this technique also which you can see here.

Here is what I used on today's card:

Stampin Up! Stamp Sets: Christmas Lodge

Paper: Stampin Up! Sahara Sand, Cherry Cobbler, Early Espresso, Chocolate Chip

Ink: Stampin Up! Classic ink pads in Early Espresso, Crumb Cake, Cherry Cobbler

Accessories: Stampin Up! Stamp-A-Ma-Jig, Versamark Ink Pad, Glassy Glaze (retired), White Gel Pen, heat tool, Big Shot, Perfect details texturz plate, texturz silicone rubber pads, sponges, dimensionals

Pin It

Thursday, September 8, 2011

Gorgeous SCRUNCH FLOWERS

Good Afternoon Everyone!

I am SUPER EXCITED because I just had a whole box of NEW STAMPS and PLAYTHINGS delivered from Stampin Up! YAY! I have been waiting impatiently for it to get here :)

While I was waiting I made this gorgeous scrunch flower card using poppy parade cardstock. I have tried a few different versions of the scrunch flower and this is my favorite way to do them. They look so soft and scrunch up really nice. You can do these with different types of flower punches or scallops. The one I used for this is the smaller Stampin Up! Scallop punch - 1 3/4". There is an awesome photo tutorial by Julie Buhler on making these flowers. The layout was inspired by this card I saw that was designed by Theresa Momber.


I wanted my sentiment to pop a little bit off the sponged background but not a lot so I just stamped the sentiment on very vanilla and then punched it using the large oval punch but then just layered it flat on the card. I wanted the focal piece to be that gorgeous flower! I am excited to do these in other colors and with some other punches! I also thought this would make a pretty Christmas card too if you change the sentiment :) Hope you try some of these pretty flowers!

Stampin Up! Stamp Sets: Elements of Style

Paper: Stampin Up! Very vanilla, Poppy Parade, Old Olive

Ink: Stampin Up! Classic ink pads in Crumb Cake, Early Espresso, versamark

Accessories: Stampin Up! 1 3/4" scallop circle punch, 5-Petal flower punch, large oval punch, clear embossing powder, heat tool, glitter brads in basics, paper piercer, mat pack, sponges, sticky strip.

Pin It

Wednesday, March 16, 2011

Sweet Joy Fold Cards

Good morning everyone!

Today I wanted to share with you a couple of Joy Fold cards that I made using the branch stamp from the Easter Blossoms stamp set. I love the way the stamp looks coloring it with a white gel pen. Very pretty and it makes it just pop off the background colors! These are so easy to do and fun to see what it looks like on different colors!

My first one is done using PINK PIROUETTE and EARLY ESPRESSO cardstock and the early espresso designer series paper from the Neutrals paper pack (gorgeous papers!)


The next one I did was using SO SAFFRON & SOFT SUEDE card stocks and the soft suede designer series papers also from the same neutrals designer paper pack


The butterflies are made using the beautiful embosslits die and the vellum cardstock. I love how they both turned out! These would be great to use for many different occasions - Birthday, Thinking of you, Get well, Sympathy.

To create a JOY FOLD CARD this is what you do:

1. For your base cardstock - cut it at 4 1/4" x 8 1/2" and then score at 5 1/2"

2. For the base cardstock that will be the opening piece - cut it at 3" x 8" and score it at 4"

3. You will need designer series paper - 1 piece cut at 4" x 5 1/4" for the inside and then 1 piece cut at 2 3/4" x 4" for the front piece

4. On your card flap piece - you will need to have 1 piece of cardstock stamped or designer series paper whichever you prefer (branch piece in my samples) cut at 2 3/4" x 3 3/4" that is for one layer - if you want to do 2 layers besides the base cut it a 1/4" smaller so 2 1/2" x 3 1/2" - after this is done adhere to the outside flap piece - the flap needs to open from the left so like a backwards book.

5. For the inside of the card adhere a white or neutral color cardstock piece cut at 2 3/4" x 3 3/4" and stamp your sentiment on. Adhere to inside flap piece.

6. Adhere your flap piece to the card base and create a closure using a punch or small stamp design, like my "For You"

There is a great tutorial on Joy Fold Cards on splitcoast stampers which you can look at by clicking here:

Hope you enjoyed the cards today! If you want to try one here are the supplies I used:

Stampin Up! Stamp Sets: Easter Blossoms, Elements of Style

Paper: Stampin Up! So Saffron & Soft Suede, Very Vanilla & Pink Pirouette , Early Espresso & Whisper White. Designer Series paper Neutrals pack, Vellum Cardstock

Ink: Stampin Up! Classic ink pads in Early Espresso

Accessories: Stampin Up! White Gel Pen, 1 1/4" circle punch, 1" circle punch, big shot, beautiful wings embosslit, sponges, dimensionals, Chocolate Chip marker

Pin It

Monday, February 28, 2011

Springtime Vintage Country Quilt

Good evening all! I love the quilted cards and as soon as I saw the Springtime Vintage Designer Series paper in the Occasions Mini I knew I wanted to do a quilt card with it! Here it is:


If you want to try a Quilted Card this is how you do it:

Take a card front size 4 1/4" x 5 1/2" piece of white card stock. Cover the card stock with assorted squares punched out of designer series paper. I used the 1 1/4" square punch. Make sure to offset the squares for each row. Then when your paper is covered cut out the quilt using the TOP NOTE DIE. Then I embossed my quilt with the petals-a-plenty embossing folder to make it look extra "quilty" That's it! Very easy and looks very cool!

I layered mine on a piece of bravo burgundy that I also embossed with the petals-a-plenty embossing folder.

Here is a full on look at the "quilt" so you can really see the embossing folder impressions:


I loved it! Very easy card and looks really pretty!

Here is what I used:

Stampin Up! Stamp Sets: Elements of Style

Paper: Stampin Up! Crumb Cake, Bravo Burgundy, Springtime Vintage DSP, Early Espresso, Very Vanilla, Whisper White

Ink: Stampin Up! Classic ink pads in Early Espresso

Accessories: Stampin Up! Big Shot, Petals-A-Plenty Embossing folder, Top Note Die, Very Vanilla Ribbon, 1" & 1 1/4" circle punches, dimensionals, sponge

Pin It

Thursday, January 6, 2011

Re-inker Splash Rose Mojo172

Good evening all! I designed this card for this weeks MOJO MONDAY sketch challenge #172. To play along just click on the Mojo Monday blinkie on the right side bar! I used a few different techniques on my card. I used the re-inker splash technique to color my rose. The rose is done in Baja Breeze on shimmer white. I also used a fun new technique called inlaid embossing. That is the white piece with baja breeze colored hearts. Check below my card for descriptions on how to do both types of techniques!

Here is the Mojo Monday Sketch #172


Here is my card:


Here is how you do the Re-Inker Splash:
Stamp your rose in versamark on shimmer white paper. Then emboss with white embossing powder. Lightly spray the flower with water until it beads. Then using a few drops of re-inker and your aquapainter gently touch the wet areas of the flower and watch the ink spread out. Keep coloring until you get the look you want and then set it aside to dry. Once dry cut it out and apply to your card.

Here is how you do inlaid embossing:
Take your base piece of cardstock and cut to size. Using punches, punch desired shapes in a different color from the base and glue the punchies to the base in a random pattern. Then run through the big shot in an embossing folder. I used the square lattice one on my card. Trim off any extra punchies hanging over the side.

Here is what you will need to make this card:

Stampin Up! Stamp Sets: En Francais, Fifth Avenue Floral, Short & Sweet

Paper: Stampin Up! Baja Breeze, Shimmer White, Whisper White, Always Artichoke, Early Espresso

Ink: Stampin Up! Classic ink pads in Early Espresso, Baja Breeze & Re-inker

Accessories: Stampin Up! Aqua painter, word window punch, two step bird punch, sponges, Heart to Heart punch, Square Lattice Embossing Folder, dimensionals, big shot, 2-way glue pen

Pin It

Tuesday, June 8, 2010

Frame Illusion - Elements of Style

I love this new stamp set that is featured in the SUMMER MINI CATALOG called Elements of Style. I finally had a chance to play with it. I follow a blog done by a very talented lady named Michelle Zindorf. She does some amazing cards and creates a step-by-step tutorial to show you how to do them. One of my favorite cards she did was one that had a frame illusion. It looks like a painting in an ornate wood frame and appears to pop right off the page. When I saw this stamp set in the mini I knew I had to use it to make a card like that! Here is my card....


I love how it turned out! I decided to use a technique called poppin pastels to color my hummingbird. I stamped it in versamark and then rubbed pastel chalk over the versamark. It really grabs the colors of the chalk. I then cut it out and popped it on dimesnionals. The rest of the card is completely flat! How cool is that?

To see how this card is done and to see my inspiration check out Michelle Zindorf's tutorial - click here

My card uses all stamps from the Elements of Style stamp set. With my card I wanted my flourishes to stay on just the "frame" part and not carry over to the canvas so when I inked those in versamark I had a post it note covering my "canvas".

Here are the colors I used on my card:

Flowers - done in crushed curry with blender pen, mellow moss & old olive (marker) on the leaves
Canvas - Sahara Sand - sponging around the edges in chocolate chip to soften it
FRAME - versamark flourishes then embossed with clear embossing powder, sponged close to cocoa first then chocolate chip on outside to darken, my shadow edge for the canvas is chocolate chip
HUMMINGBIRD - stamped in versamark then used Stampin pastels in summer sun, lovely lilac, ruby red, garden green

Here is a list of supplies used:

Stamp Sets: Elements of Style

Paper: Stampin Up! Basic black, Cajun Craze (new upcoming color!), Whisper white

Ink: Stampin Up! Classic ink pads in Sahara Sand, close to cocoa, chocolate chip, crushed curry, mellow moss, versamark

Accessories: Stampin Up! Stampin pastels, blender pen, dimensionals, clear emobossing powder, heat gun, sponges, chocolate chip stampin write marker

Hope you try one out!! Night all!

Pin It