Thursday, April 29, 2010

Mother's Day Easel Card

Here is a card that we made in my technique class I held last night that was our Mother's Day Specialty card. This turned out really pretty I thought! The flower was a lot of fun to make and I will post instructions later on how to make those.


This is more of a side view so you can see the iridescent ice shimmer on the "MOM"


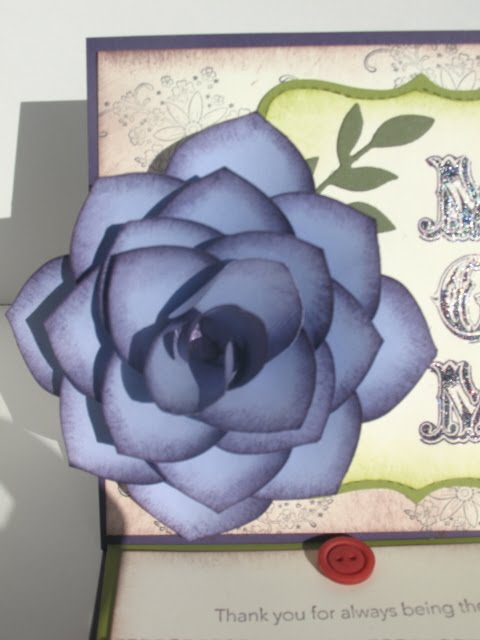
Here is a close up of the flower using the ornament punch. Isn't that pretty?

The easel card can be made any size, mine is a 5 1/2" x 5 1/2" square. All you need to do is make the base of your card twice the length of the card front. So your base and your card front are two seperate pieces. My base was 5 1/2" x 11", and my card front then was 5 1'2" x 5 1/2". Your base piece you will score in half first, just like you were making a regular card, but then on one half you score that section in half again. So mine was scored at 5 1/2" and then at 2 3/4". Then you fold at the score lines so the one half that is scored in the middle will fold up like a standing triangle. You decorate your card front and then attach it on the bottom side of the triangle. So this makes your card fold flat like a normal one, but then when you pull it open your card front stands up. You have to adhere something on the inside like a button, brad, punched shape with dimensionals, to help keep it standing. Hope that makes sense, if not feel free to ask me any questions. I will try making an "official" tutorial with pictures later on.

To make this card here is what I used:

Stamp Sets: Messages For Mom This is located in the Occasions Mini Catalog that is only valid through April 30th, so you will want to be sure and get this set! It is very versatile and the sayings can be used for many occasions. Product number is 117016 for wood mounted $25.95, or #118580 for clear mounted $18.95. Click here to buy it now.

Paper: Stampin Up! Very Vanilla, Old Olive, Elegant Eggplant, Almost Amethyst

Ink: Stampin Up! Classic ink pads in Elegant Eggplant, Chocolate Chip, Old Olive, Stazon Black

Accessories: Stampin Up! Stampin Dimensionals, Stamp-A-Ma-Jig, Iridescent Ice, Heat gun, Big Shot Sizzix Top Note Die & Little Leaves Die, Sponges, versamarker, Stampin Up! Ornament punch, Scallop circle punch, sticky strip, the ribbon is from the Masterpiece collection product #116230, and the button is from the Playground set product #116313. The ornament punch is not shown in the catalogs right now because it was a carryover item from the Christmas catalog. It is available and if you want to order it the product number is 116794 and it is $15.95.

Hope you try and make an easel card. They are so fun and are an easy way to show off that special piece of art you made! If you make one, leave a comment and place a link to your's so we can oooh and ahhh over it! Happy Stamping everyone!

Pin It

Wednesday, April 28, 2010

Red Bird - Salted Background Technique

Afternoon everyone! Tonight I will be hosting April's Technique class where we will be trying a couple of baby wipe techniques and also a salted technique background. This is the card we will be making using the salted background technique.


Isn't that pretty?? I was inspired for the layout by a card I saw on the splitcoast stampers website. I love how it makes it look like a framed work of art!

To create the salt background here is what you do:
Take a piece of glossy white paper and spritz it with water. Using re-inker and your aqua painters, swish color around on the paper. Then you sprinkle it with salt, coarse salt works the best but I used just regular sea salt on mine. You can also use table salt if that is all you have. Then you let it dry, either naturally or with heat gun. Then brush off the extra salt. That is all there is too it!

If you want to make this card here is what I used:


Stamp Sets: Stampin Up! Bird On a Branch

Paper: Stampin Up! Creamy caramel (retiring July 1st),
whisper white, glossy white & basic black

Ink: Stampin Up! Classic ink pads in real red, stazon black, re-inkers in ballet blue & brilliant blue

Accessories: Stampin Up! real red & basic black ribbon, pop dots, sea salt, aquapainter

Pin It

Thursday, April 22, 2010

Select Stamp Sets 20% off

Hi Stampers!

I wanted to take a minute and remind you of the 2-Step Into Spring Promotion that ends on April 30th.


When you purchase the AWASH WITH FLOWERS stamp set (or better yet - earn it FREE with a qualifying workshop) you are eligible to purchase any of the following stamp sets at 20% off:

Greenhouse Garden Reg. Price $25.95 Sale Price $20.76
Fifth Avenue Floral Reg. Price $24.95 Sale Price $19.96
Flower Fancy Reg. Price $36.95 Sale Price $29.56
Trendy Trees Reg. Price $17.95 Sale Price $14.36

Here are a couple of roses I colored using a technique called re-inker spread using the Fifth Avenue Floral set. Colors used in the roses are crushed curry, pink pirouette (one of the colors that will be available again July 1st, & tangerine tango (now retired but you could use dusty durango instead. This stamp set is so pretty and fun to play with you will definately want to add this one to your collection!


Remember this offer is only good through April 30th so don't miss out! Click here to order or here to earn it free!

Don't forget to take a look at all of the current promotions from the PROMOTIONS TAB at the top! Happy Stamping everyone!

Saturday, April 17, 2010

Baby Wipe Ink Pad Technique

Hi Everyone!

As I mentioned yesterday, of the techniques we will be doing in my April technique class coming up on the 28th is the Baby Wipe Technique. You can use a baby wipe to create fun backgrounds or a custom ink pad. Here is another one of the cards we will be making in class.

This card uses the BABY WIPE INK PAD technique. You take a baby wipe and fold it into a square. Mine was about 3 inches by 3 inches. You take re-inkers and place drops in a random pattern covering the square. Then you ink your stamp using your baby wipe ink pad. You will want to be sure to have your baby wipe on a hard surface like a plastic plate because it will bleed through.

This picture is taken from the side so you can really see the way the colors look from our custom ink pad.


I wanted to add a little bling so I used iridescent ice on the flowers which you can't see well from the side view so here is a front view so you can see the shimmer.


I wanted to play with our current in colors, so that is what I used on this card. The Rich Razzleberry & Melon Mambo will be becoming part of the core color line in the next catalog! I am excited because these colors are so fun to play with! If you want to try one here is what I used:

Stamp Sets: Stampin Up! Upsy Daisy

Paper: Stampin Up! whisper white, rich razzleberry, crushed curry, melon mambo, basic black

Ink: Stampin Up! Re-inkers in rich razzleberry, crushed curry, melon mambo, classic ink pads in rich razzleberry & crushed curry

Accessories: Stampin Up! Scallop Trim punch, key tag punch, white gel pen, versamarker, iridescent ice, dimensionals

Happy Stamping!

Pin It

Baby Wipe Stripe Technique

Hi Everyone!

One of the techniques we will be doing in my April technique class coming up on the 28th is the Baby Wipe Technique. You can use a baby wipe to create fun backgrounds or a custom ink pad. Here is one of the cards we will be making in class.

This card uses the BABY WIPE STRIPE technique. You take a baby wipe and fold it into a square. Mine was about 3 inches by 3 inches. You take re-inkers and place drops along the folded side, alternating your colors. Then you swipe it across glossy paper. I started my swipe in the middle and then moved it up and down to cover the entire cardstock for my sky.


I love how it turned out! If you want to try one here is what I used:

Stamp Sets: Stampin Up! Inspired by Nature

Paper: Stampin Up! Glossy white, basic black & bermuda bay

Ink: Stampin Up! Re-inkers in bermuda bay, crushed curry, dusty durango & real red, black stazon

Accessories: Stampin Up! Two-Step Bird Punch, dimensionals

Be sure to check back tomorrow where I will show you another card we will be making in class only this will use the baby wipe as an ink pad. Happy Stamping!

Pin It

Friday, April 9, 2010

Loads Of Love Birthday Card


Here is a fun card that I made for my Dad's birthday. It is a little late so I hope he doesn't mind! Before starting my stamping I tore the edges of each side from both the very vanilla & close to cocoa cardstock. For the coloring I used my Stampin Up! classic ink pads with the blender pen. I wanted a look that was kind of between watercolor and marker. After coloring the truck I masked off the top to just under the tires using post it notes and then sponged chocolate chip ink for the road and around all the edges of both the vanilla & close to cocoa pieces. It might be a little hard to see but for the sky I very lightly sponged bashful blue around the top of a punched scallop oval for clouds. I used iridescent ice on the candle, flames & top frosting and jumbo pewter eyelets for the tires. I thought it turned out really cute!

Stamps Sets: Loads of Love, Loads of Love Accessories & Voila

Paper:Very Vanilla, Close To Cocoa (retiring) & Ruby Red (retiring)

Ink: Stampin Up! Classic ink pads in Ruby Red, Classic Black, Blush Blossom

Accessories: Stampin Up! Markers in Not quite Navy, Garden Green, Ruby red, Old Olive, Summer Sun, Pumpkin Pie, chocolate Chip & Close to cocoa; Blender pen, iridescent ice, versamarker, heat gun, crop-a-dile, Jumbo Pewter Eyelets, sponges & Stampa-ma-jig.

Thanks for looking!

Pin It

Thursday, April 8, 2010

We are getting NEW COLORS!

Before I get busy stamping I wanted to share some exciting news with you! WE ARE GETTING NEW COLORS! Yay! Stampin Up! just released that starting with the new catalogs July 1st we will be getting a new color pallette to play with! Doesn't that sound like fun? They did give us a peek at the new colors and let us know which colors are retiring so we have the chance to stock up on our favorites. They will be adding some of the past and current in colors to the main lines as well as some new ones. Enough with the blabbing I know you can't wait to see what I am talking about so here are the new color pallettes for the upcoming catalog!


In case you have a hard time reading the names here they are:

BRIGHTS COLLECTION: REGAL ROSE, MELON MAMBO, RICH RAZZLEBERRY, PACIFIC POINT, TEMPTING TURQUIOSE, OLD OLIVE, DAFFODIL DELIGHT, PUMPKIN PIE, TANGERINE TANGO & REAL RED

NEUTRALS COLLECTION: RIVER ROCK, CHOCOLATE CHIP, SOFT SUEDE, EARLY ESPRESSO, CRUMB CAKE, SAHARA SAND, VERY VANILLA, WHISPER WHITE, BASIC GRAY & BASIC BLACK

REGALS COLLECTION: ELEGANT EGGPLANT, NIGHT OF NAVY, NOT QUITE NAVY, ALWAYS ARTICHOKE, GARDEN GREEN, MORE MUSTARD, CAJUN CRAZE, RIDING HOOD RED, CHERRY COBBLER, BRAVO BURGUNDY

SUBTLES COLLECTION: PINK PIROUETTE, PRETTY IN PINK, ROSE RED, PERFECT PLUM, MARINA MIST, BASHFUL BLUE, BAJA BREEZE, WILD WASABI, CERTAINLY CELERY, SO SAFFRON

Aren't those AWESOME?? On a sad note in order to make room for all the new goodies as you know we have to say goodbye to others... there are a few colors on here that I hate to see go! Here are a list of the retiring colors so you can stock up!


In case you have trouble reading the names they are:

PINK PASSION, PIXIE PINK, PALE PLUM, ORCHID OPULENCE, LOVELY LILAC, LAVENDER LACE, ALMOST AMETHYST, BORDERING BLUE, BROCADE BLUE, BALLET BLUE, BRILLIANT BLUE, TAKEN WITH TEAL, GLORIOUS GREEN, HANDSOME HUNTER, SAGE SHADOW, MELLOW MOSS, GREEN GALORE, GABLE GREEN, BARELY BANANA, YOYO YELLOW, SUMMER SUN, APRICOT APPEAL, ONLY ORANGE, REALLY RUST, RUBY RED, CAMEO CORAL, BLUSH BLOSSOM, CREAMY CARAMEL, CLOSE TO COCOA & GOING GRAY

You can see that there are quite a few retiring colors that can be substitued with some of the new colors. There are those I will miss like creamy caramel which I will be stocking up on! I think overall the change will be good and I look forward to seeing the new in-colors for the catalog too! Which by the way will be around for TWO years instead of one! Yay! The retiring colors include the cardstock, inks, ink refills & markers. Wanna stock up on your favorite colors now? Visit my Online store by clicking on the STAMPIN UP! LOGO link on the left sidebar!

Happy Stamping everyone! Laura

My NEW Blog!

Good Morning everyone!
I have FINALLY got around to putting together a blog to showcase my Stampin Up! business! I am sooooo excited and it is something that I have been wanting to do forever now. This is a work in progress so I hope you will stick with me. Now that I have my layout...I need to go get crafting to start getting the fun stuff on here! I am off to stamp!