Tuesday, March 31, 2015

StitchyBear Scrap Recipe Page

Hi Stampers!

SURPRISE! I finally had a chance to participate this week in our Loves Rubberstamps Challenge! I have really missed being able to play along in our challenges :)

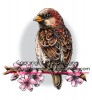
This week we have a special Guest Sponsor, StitchyBear who provided each Design Team member a digi of their choice to create a sample for the challenge! It was hard to pick but as soon as I seen this super adorable Baked With Love bear...I collect bears and sometimes have issues with cooking so it was a must have for me!

I am a decent cook...most days...but every once in awhile the smoke alarm is our dinner bell and my brother never lets me forget that I have a tendency to burn things sometimes :) The problem is I am usually in a hurry to get stuff done as usual and like to cook everything on high! You would think I would learn by now but I haven't - LOL!

One of my favorite crafty things to do is create Scrap Book Recipe Pages. My favorite size to create are 6x6 pages. So when I saw this set I knew I wanted to use him on a recipe page.


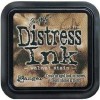
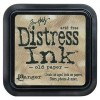
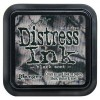
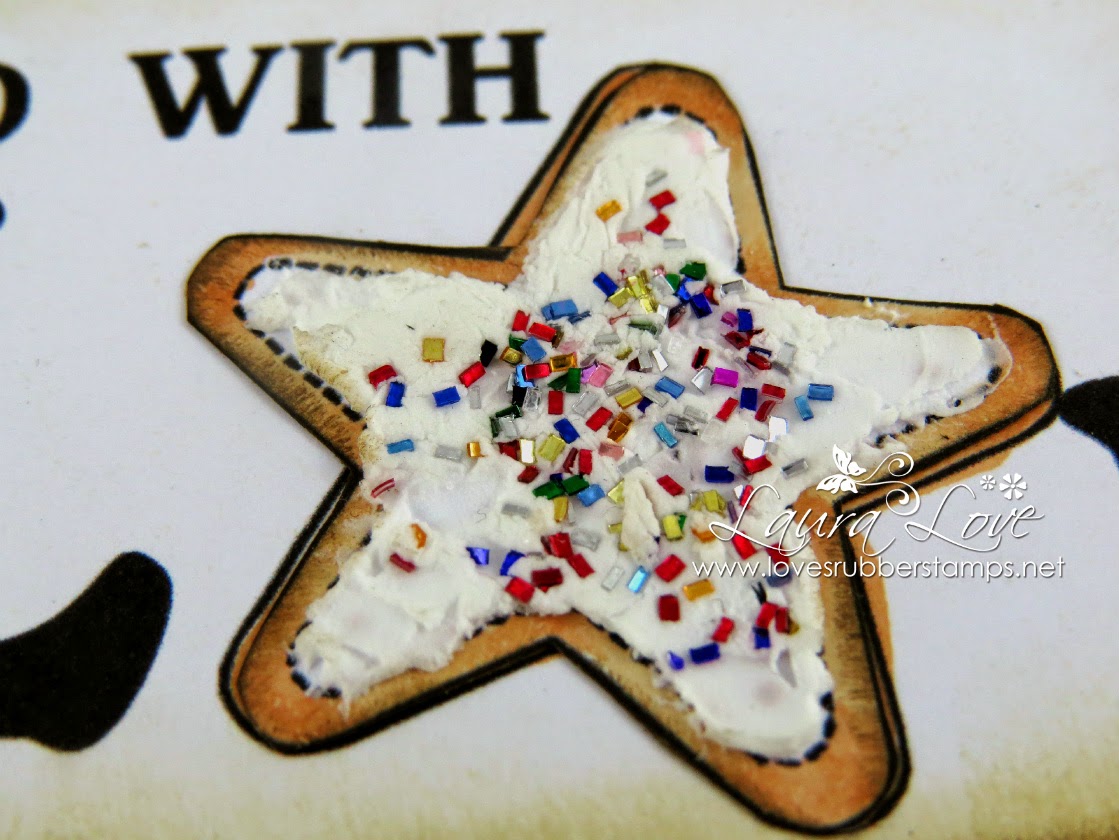
Here is the outside page with the recipe folder tucked away in a pocket. This week our Loves Rubberstamps Challenge is to use your favorite embellishments which I did! I LOVE crochet lace, it is one of my go to things and I seem to reach for it even more than ribbon. I also love metal embellishments so I used a Tim Holtz clip to hold my file folder closed and I also LOVE cooking and baking charms. I tend to hoard them rather than use them because I love them so much,... but I did manage to use one on my page since it is for me :) I also love doilies, die cuts, pearls & shimmer. And the creme de la creme of my favorite embellishments is Tim Holtz Walnut Stain distress ink....I need to use it on everything I make - LOL! 

Here is a look at the recipe card pulled out....


I printed the Baked with Love sentiment twice and then cut out a cookie to layer because I wanted to add "frosting and sprinkles" I used Whipped Spackle and then sprinkled multi-color chnky glitter on it while wet and let it dry. Here is a close up so you can hopefully see the texture on it:


Here is a look at the recipe... it is for Quaker Oatmeal Scotchies which are totally delicious! I will write the recipe for you in case you can't read my chicken scratch...


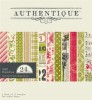
The papers I used are from an Authentique Christmas set called Festive. The outside papers I used are the Vintage Cookie Cutter paper from the Cookbookin line. My recipe card and the yum scale stamp are from a Stampin Up set I have.

Here is a last look at that super cute bear...


Quaker Oatmeal Scotchies:

Ingredients:

1 Cup (2 sticks) butter or margarine
3/4 cup granulated sugar
3/4 cup brown sugar
2 large eggs
1 tsp. vanilla extract
1 1/4 cups all-purpose flour
1 tsp. baking soda
1/2 tsp salt
1/2 tsp cinnamon
3 cups Quaker Oats uncooked (can use quick oats or old fashioned)
1 2/3 cups (11 oz.) Nestle Toll House Butterscotch Flavored Morsels

Directions:

Preheat - oven to 375° F

Beat butter and sugars in a large bowl until creamy. Add eggs and vanilla extract; beat well. Add combined flour, baking soda, salt and cinnamon; mix well. Add oats and morsels; mix well.

Drop dough by level tablespoons full on an ungreased cookie sheet.

Bake 7 - 8 minutes for a chewy cookie. Bake 9-10 minutes for a crisp cookie. Cool on the baking sheet for 2 minutes; remove to wire racks to cool completely. Store tightly covered.

Enjoy! I hope that you will play along in this weeks Loves Rubberstamps Challenge and show us what your favorite embellishments are! 

Hugs! 
Laura

I will be entering this in the following challenges:

Craft Your Passion - Anything Goes
Not Just Cards - Anything Goes
613 Avenue Create - Anything Goes
Scribble and Scrap - Anything Goes
Crafty Calendar Challenge - March Add Some Metal
Open Minded Crafting - Food related
Chocolate, Coffee & Cards - Something Yummy to eat or drink
Simply Papercraft - Anything Goes
Stempelsonne - Anything Goes
4 Crafty Chicks - Humor
Aud Sentiments - Anything Goes with a sentiment
Crafty Gals Corner - Anything Goes
Inspiration Destination - Anything Goes
Simon Says Stamp - Anything Goes


Monday, March 30, 2015

Pawsively Awesome


Hi Friends and Stampers,

I am late posting my Monday Inspiration.  I had an idea what I wanted to do but I got into an emergency cleaning frenzy.  Partly because I never feel like cleaning and when I do, it's an emergency, lol.    Here is a card I whipped up today.


I have to confess.  This stamp set really did steal my heart, I love it.  I cut out a window with my Blueprints 13 circle, then I cut out another window on Kraft colored cardstock and then placed the sawtooth circle on top of that and cut that out.  That left me with a ring of the sawtooth pattern that I glued on the top of the window.  Then I stamped my cute puppy on the inside of the card and colored with Copic Markers.  Then I stamped a few paw prints on the designer paper and added a flag from my Blueprints 12 die-cut.  

I hope everyone is having a Happy Holly-Day Monday!  You do not want to miss out on the New Items in the store!!! 

Thanks for Looking in on Me, 

Holly

Sunday, March 29, 2015

Sensational Sunday Inspirations Blog Hop

Good Morning Stampers!

Welcome to the Loves Rubberstamps weekly Sensational Sunday Blog Hop! The Design Team has created some gorgeous projects for your Inspiration. Check out each link and leave a comment. If you get lost along the way, each stop will have a full list of links. One of the Design Team posts is the hop's Sensational Sunday Sweet Spot and a name will be drawn from that list of comments to be in a monthly drawing for a $20 Loves Rubberstamps Gift Voucher! We will draw the winner of the Voucher the 1st Sunday of each month from all the comments left on the design team blogs! Remember, you have until 8:00 pm CST Saturday to leave your comments!

Hope you are all having a great weekend so far. My weekend will be a busy one catching up with emails and shipping some orders. I had the stomach flu for 3 days this week which was not a fun time! The medications I am on for my colitis suppress my immune system which makes it easier for me to get sick. So I spent a lot of time sleeping which I needed since I sometimes don't get very much!! I am keeping my fingers crossed that this will be my last major illness for awhile because I am sure tired of feeling cruddy that is for sure!

With being sick this week it made me think of Get Well Cards and I wanted share one of my favorites that Lydia had created that I found super cute...


I love the Stitched Party Banners as a card shape! I also really love how Lydia used little stamped images inside her shaker card with the sequins. Too cute!

Here are the products that Lydia used on her card:


Now let's hop along and see what the Design Team ladies have in store for you...

Laura - Loves Rubberstamps Blog - You are here...
Thanks for stopping by!
Laura!

Thursday, March 26, 2015

Bloom Girl Art Journal Page by Shanna

Welcome to a new inspirational Thursday from yours truly (Shanna)!!! 

I have been wanting to play more with my Bloom Girls and stencils and just really get back into playing with my art journal and mixed media goodies!


So here for you is a fun art journal page YAY! I even got to use my new Tim Holtz stickers. 


I have a video that I have of making this page, but have yet to load and edit it. Bare with me I will get it up shortly! 


I used modeling paste with a black gelato to create the black paste I used with the stencil. I then colored the image with my watercolor pencils and gelatos. I used gelato around the image only after using some matte gel medium with a stencil to add to the background. 


Here you can see the stencil giving texture combined with the gelato and some Twinkling H20 paint. 


Lastly I wanted to add a flower here!! It started out white/cream. I went over it with a gelato, buffing it with my finger and then gave it a spritz of Gold Foil Prima Bloom Spray. 


So I do hope you enjoyed this lovely art journal page. I will have a video up on my youtube this week. 

Items Used:

Monday, March 23, 2015

Thanks


Hi Friends and Stampers,

It's my day to show you some Inspiration.  I actually made a card from a card that inspired me.


Here is Kimberly Crawford's card that inspired me.   And she made another one as well.   And so did I. 


I didn't focus so much on triangle pattern with my ink on this one, which was my first one, but I did try Kimberly's tutorial on the first one shown and I really like the triangle within the triangle pattern, it just creates a better eye flow.    So like Kimberly, I heat embossed with white embossing powder and turned my distress inks upside down on my craft sheet and then picked up the ink with a paint brush from there.  I wiped off with a paper towel and then added a velum stitched traditional tag.  Added the die-cut Thanks and then added a few sequins.  

These were a lot of fun to make!  

I hope you will join us in our Current Blog Challenge and you will want to head on over to the store to check out the New Items that Laura has added!  I'm so excited about the Wink of Stella in the store! 

Thanks for Looking in on me.  

Holly


Sunday, March 22, 2015

Sensational Sunday Inspirations

Good Morning Stampers!

Welcome to the Loves Rubberstamps weekly Sensational Sunday Blog Hop! The Design Team has created some gorgeous projects for your Inspiration. Check out each link and leave a comment. If you get lost along the way, each stop will have a full list of links. One of the Design Team posts is the hop's Sensational Sunday Sweet Spot and a name will be drawn from that list of comments to be in a monthly drawing for a $20 Loves Rubberstamps Gift Voucher! We will draw the winner of the Voucher the 1st Sunday of each month from all the comments left on the design team blogs! Remember, you have until 8:00 pm CST Saturday to leave your comments!

How is your weekend going? My Friday was spent doing the business taxes for both my business and my husbands. Talk about a not fun day that was! LOL! I think I put off doing them longer and longer every year :( 

So after my mentally exhausting day I actually took a mini me break, spent some time in my craft studio and made a project to share with you today! I know....it has been a looooonnnng while!

I have been intrigued by a project I came across called the Documented Life Project. This is where you combine an art journal with a planner. Each week they give you a prompt and you are supposed to use it as inspiration for your page. Well I didn't get to start at the beginning of the year so I have been more of a lurker and following how others interpret the prompts and what they create. It is really interesting. 

I have been fascinated by art journals for a long time, I spend many (way too many!) hours on youtube watching tutorials on art journal pages. Trying to learn tips, tricks and must have products to try and make myself feel comfortable to try it out. It is intimidating but today I decided to just jump in! 

I didn't have a particular prompt from The Documented Life in mind when I made this but I knew for sure I wanted to use the planner/art journal style for my page. They did feature a prompt of 5 Layers which this would fit under - Tissues Paper, Gesso, Distress Stain & Ink, Patterned Paper & Stamped Images. Now that I have started hopefully I will be able to do a page a week to stay up on this project! So here is what my page turned out like....


Now I LOVE how this turned out in the end but I have to say when I just had the background and hadn't got very far I didn't really like how it was looking and felt like I ruined my brand new journal by making a disaster. LOL! But I kept at it adding layers and colors and it really came together. Now I can't stop looking at it and can't believe that I made it - LOL!

I really love watching Vicky Papaioannou on You-Tube (She is AMAZING) and she does a great job with her tutorial videos. On one of her videos I watched she said that if you are not sure where to start, cover your pages with tissue paper and it becomes less intimidating. So that is what I did to get myself started. I used Tim Holtz's Melange Tissue and glued it down with Gel Medium. Then I put Faber-Castell Gesso on top and then used distress stains in the colors, Tumbled Glass, Mustard Seed and Spiced Marmalade. I sponged Walnut Stain and Black Soot around the edges.

The large tree branch is actually a winter tree from an old Tattered Angels set that I just used like a branch. I stamped it in Archival Ink and then filled it in with my Black Big Brush Pen. Then I used a Turquoise color Big Brush Pen to outline the branches. (LOVE LOVE LOVE these pens!)

That stunning bird is from the DoveArt Studio collection. I think it is so beautiful! I colored it with copics and then cut it out, popping it up on dimensionals. I added some little pink flower punchies from a Stampin' Up punch to the tree branches to try and tie in with the flowers in the bird stamp. 
The believe stamp is from a Katy Sue Designs Wishes & Vines set from Flower Soft. I created the sentiment from the computer. One thing I learned is that if you create a sentiment with your computer...don't attempt gel medium on the top...it will be smeary (can you see on the A BIRD part) That is how you learn I guess! 

The stamp image on my border is from the Tattered Angels Architectural Trims set. I also added some whipped spackle through a Crafter's Workshop Stencil called Well Rounded. It has a variety of texture style patterns on it. I did notice that the whipped spackle almost soaked up some of the ink from my page and kind of colored itself. I am not sure if it is supposed to do that or if I should have sealed something or what ...but I like how it turned out so it is all good :)

I should say that the journal I am using is the small 5"x8" Dylusions Creative Journal. It is a great size I think for this style of art journal/planner and since I plan on using a lot of stamped images it seems like a great size for that. Plus it is WAY less intimidating then the large one since I am a beginner! LOL! 

Here is a close up of that gorgeous bird on a branch image...


Also... I wanted to share a few pictures I snapped of a Male House Finch who was singing his little heart out in our tree the other day :) I have waited all Winter to see some birds so I could try my new camera on some bird shots - LOL! 


Now let's hop along and see what the Design Team ladies have in store for you...

Laura - Loves Rubberstamps Blog - You are here...
Thanks for stopping by!
Laura!

Other Supplies Used on My Project:
Tattered Angels - Chillin'
Katy Sue Designs Silhouette Stamps - Wishes & Vines
Tim Holtz Distress Stain - Tumbled Glass, Mustard Seed, Spiced Marmalade (will be in the store soon!)
Crafter's Workshop 6"x6" Stencil  - Well Rounded (will be in the store soon)
Big Brush Pens - Used the Black, Brown & Turquoise Colors
Tim Holtz Melange Tissue (will be in the store soon)
Stampin Up Flower Trio Punch


I will be entering this in the following challenges:
Sassy Studio Designs - Anything Goes
Scrap & Craft - Flowers
Addicted to Stamps & More - Anything Goes
Scrapper's Delights - Anything Goes
Word Art Wednesday - Anything Goes
Deep Ocean Challenge - Vintage
Shopping Our Stash - I Made This
Crafting From the Heart - Anything Goes #51
Love To Scrap - Anything Goes
Brown Sugar Challenge - Anything Goes


Saturday, March 21, 2015

Happy Birthday card!

Happy Saturday Friends!  I have another birthday card to share for today's inspiration.

and here it is...


Wow, this month has been full of birthdays and I have even more to come before the month is over!  I am actually celebrating a good friend's birthday tonight so I wanted to make her a fun and festive card!  Since The Greeting Farm has so many adorable birthday images, I decided to get this cutie out!  This image is called Double Cupcake Anya and she's just too sweet with her two cupcakes!  I colored her up with my copics and then added some Wink of Stella as well as some glossy accents to parts of her outfit and cupcakes.  The fun papers I used are from my favorite Doodlebug Design and this collection is called "Fruitstand".  The bright colors and fun backgrounds are always perfect for a celebration! To finish off my card, I added some flowers from Wild Orchid Crafts, some ribbon and sequins.  As you can tell, I just had to add a little bit of everything! :)

Here is the full supply list for my card:
Double Cupcake Anya - The Greeting Farm
Fruit Stand - Doodlebug Design
Black Tuxedo - Memento Ink
Spun Sugar - Tim Holtz Distress Ink
Wink of Stella - Coming soon!

Make sure to check out the Loves Rubberstamps store to see all of the cute birthday images from The Greeting Farm

Have a wonderful weekend and see you next week!

Hugs,
Marcy

Thursday, March 19, 2015

Aries Tilda


Welcome to a new day of inspiration. I have been sharing some of my Magnolia cards a lot lately. I felt so bad having these pretty images just sitting there waiting to be colored. 


She is colored with copics to match some My Mind's Eye papers and embellished with Wild Orchid Craft's flowers. 


Thank you so much for stopping by. I hope you get to come back again!

Item Used: